Wednesday, January 30, 2013

Vintage dress goes va-va-va-BOOM

Hey everyone! I know it's been more than a week since I updated. I've been preoccupied with my classes and trying to catch up on my sleep (blarg, that's another story). Has anyone seen the KFC commercial where the girl says "Game day bucket goes, boom"? I can't get that out of my head, it's hilarious. Anyways, that's my inspiration for today's title.

Today I'd like to share the first dress I've ever made from a pattern! I have a huge stack of patterns that I've accumulated at random sales/Black Fridays, and I've finally got a round to working on them! I had to watch a couple video tutorials to help me read the pattern (believe me, it's like a whole other language).

Vintage, please!

Refashioning has been great, but I definitely feel more satisfied making something from scratch. Well, not exactly from scratch because I used a pattern, BUT it's still something from nothing, right??? Like I've mentioned earlier, I really like the 1940's, 50's style of madmen or pin up girls. The dresses that I see in boutiques or at online stores have been pretty pricey....so let's make magic! I've found a couple patterns made by Butterick, Vogue, and Collete Patterns that capture the silhouette of that era. Luckily for me, I snagged a couple Buttericks and Vogues on the cheap.

  • I'm using a Vogue Vintage pattern (V1136). I first had to trace out the pattern pieces and cut them out. You can see Camilla, my little helper was completely worn out after a couple hours.


  • I made a muslin of the dress and it took me about...15 hours to trace, cut, and assemble the dress. O.O wowza.

  • Then I thought about how I would like to alter the pattern to make it more my style. The pattern placed a bunch of pleats by the butt area, which is not very flattering. I eventually redrafted the skirt back and narrowed the skirt (it originally came out a bit A-line). 

  • I bought the second fabric at Hancock's. They had a blowout sale that was 40% off with an additional 15% off coupon. I know that you should wash and dry the fabric before you sew because cotton is bound to shrink....but I couldn't wait :) The material has some stretch to it, but I wouldn't count on it to hold up to holding in my curves.

 
  • I'm also psyched to say that my sewing machine is 100% awesome. With my prior Singer machine, it only came with the essential accessories (zipper foot and buttonhole guide), but my Brother machine came with ALL of the accessories, even the optional ones (narrow hem, blind hem, quilter, etc)! So I did a blind hem stitch on the bottom

  • I didn't want to invest in an invisible zipper foot, so I did my best with the regular zipper foot


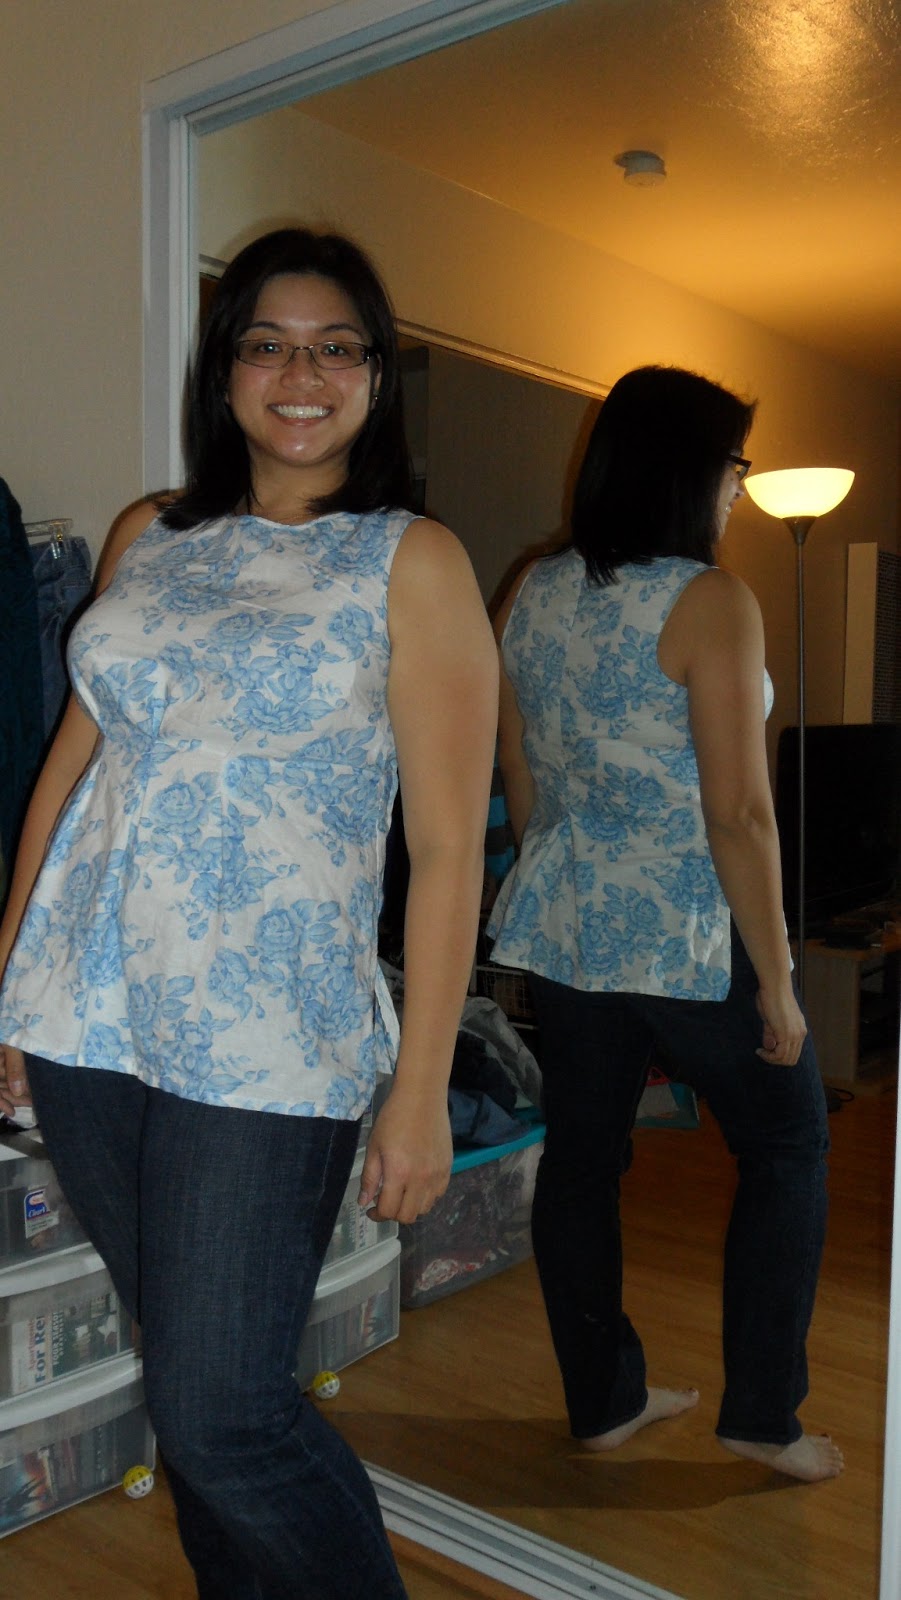
  • Ok, now for the unveiling! I think it came out pretty well considering I still don't own an iron.


I just started messing around at the end :p I hope you guys enjoyed my post. I can't wait to start working on the next one :)

I wanted to add one picture that made me look

domesticated. Didn't have a baby to swaddle,

so I picked up my cat :)


Bye bye!


Tuesday, January 22, 2013

Removing the hoochie: Separating the skirt from the bodice of the dress

ahh, the good old days

For the past 2 years (yes, it's been that long) I've always wanted a pleated skirt. I think it has something to do with the 40's-50's vintage fashion resurgence that occurred lately. I'm also one of the many that are digging the wears on Madmen. I also like the idea of conservative-ness, and trending towards the more elegant versus the flashy. I remember back in the day when I would go gaga over anything that was covered in glitter or sequins. I reluctantly pass those items in the store because they just don't go with my more mature closet. I guess that happens to everyone, right? Have you let go of your college wardrobe yet?

Again, got these from pinterest.
Too lazy to figure out how to link them

Anyways, I really wanted a pleated skirt, especially one with a modest hemline so that it can be worn casually. I've seen a couple pleated skirts at flea markets and retailers, but they've always been pretty expensive. But wait! I found one at SA's 50% sale...except it was attached to a hoochie top. The dress is made by LC Lauren Conrad, and boy, do I have a bone to pick with her. I've seen some of her stuff at Kohl's, and I'd have to say that her style is conservative + hoochie trends. This is of course my opinion, and some of her clothes are fine. However, there are times when I find something utterly timeless being mashed together with something "junior" (I picked this term up from this season's Project Runway:All Stars, which is not a complement). Here's the dress that I found at SA. I'm not a fan of the illusion neckline. I think it makes it look cheap.


                                 Before: The flash makes it look more pink than it really is. I'm gonna saw you in half! Mu-hahaha

There was a lining underneath, and all four pieces were sergered together along the waistline. It took me forever to seam rip the top from bottom. I also had to reattach my lining to the waist band. Sorry, I don't have any pictures for this refashion. There wasn't much technique involved with this one, just a lot of time and patience.


Oooo, and another note: My washable Crayola markers came in the mail today. I bought them to make marks on my material. I'm super excited to use them. The chalk pencils from the store were very difficult to use and impossible to show on camera. I can't wait to use them!

Thursday, January 17, 2013

A shirt for afternoon tea, even though I hate tea parties: Tailoring a linen shirt

Before: Shapeless and baggy
After: Cinched at the waist and a flare in the back


Well boys and girls (mainly girls), I've gone and done it again. Another refashion! This time I chose a tank that was more fitted to my body (aka I bought it in the women's section this time). I was immediately drawn towards the vividness of this vintage print. It's made of a linen blend and I've always wanted a fitted linen shirt. I got this at the Salvation Army's 50% off sale (expect to see most of my materials from there). I, of course, made sure that it could fit the largest of my womanly dimensions (bust and hips) before I purchased it.

My thoughts on linen...

Linen is expensive to purchase at fabric stores (around $10/yd, wowza) and most retail shirts don't fit me well. It's not a very stretchy material, so the clothing has to be cut just right for it to fit anyone correctly. It's a thin and lightweight material but can be on the scratchy side. Now that I've given it some thought, why would anyone pay so much for it??? Haha, all kidding aside, linen shirts and pants have a crispness to them that makes them look structured. I've noticed that most linen shirts are usually cut with extra room. Take a look below.


I got all of these from Pinterest. I have no clue where they came from.


One more note before we begin....

I was enamored with the idea of making pleats in my shirt. However, I lacked the foresight to see that I would need something to cover up the pleat stitch. For those who would like to know more about making pleats, you should watch this video. Anyways, I didn't have enough material to make a sash, so I removed the pleats and started over again. Note: pleats are best used when you can cover up the pleat stitch (skirts, pillows, etc), not for the middle of a shirt. Ok, let's begin!

Tailoring a linen shirt


  • The bust already fit me, and there was already a bust dart on the side so I didn't do anything to that area. Same with the shoulders and arm holes.
  • As I mentioned earlier, I tried to cinch the waist by adding pleats, which didn't work. I kept the material gathered in the same place, but sewed dart on the inside (Basically a straight line). 
    • Placement of darts
      I don't know if anyone else does this, but I usually mark on the shirt where my waist is, and where my bust begins. That might mean making 2 "nipple marks". Haha, it's awkward to explain, but I think it's necessary.

3 darts along the waist. 


  • Next is taking in the material in the back. I wanted to create a giant dart in the back. While I was wearing the shirt, I pinched the extra material on the back and secured it with a clip. Then I inverted the fold of material and sewed a dart.
    • Apologies if you can't see the creases of fabric. I don't own an iron, so the folds aren't crisp.
  • I had a lot of extra material on the upper back and the neck hole  so I did the same thing. I pinched the extra material at the neck hole, took off the shirt and inverted the fold. Then I drew a line from the pinch at the neck hole, down to the top of my dart. Sew along the line.

There DONE!!!!


I hope you guys enjoyed this tutorial. I can't wait for the weather to warm up so that I can wear this for you guys. Thanks to those that commented on my earlier postings. I'm glad to know that people are actually reading the stuff that I put here. Yay! Let's get crafty!

Wednesday, January 16, 2013

Enjoyment

This was inspired by So I Sewed This..'s blog about spreading enjoyment through sewing. I'll have to admit that, though I am fairly new to blogging and tailoring, I overwhelm myself with different ideas/projects or urges to buy more materials. I've seen other blogs declare similar resolutions, where they will post less and sew only for enjoyment. I guess I should create some parameters for myself as well.

How will I focus on enjoyment?

  • Stop buying random yards of fabric just because it's cheap. I already have a giant box of materials that are waiting to be used. Let's focus more on creativity and not consumption.
  • Same goes with buying refashioning clothes at thrift stores. 
  • Finish one project before I move on to the next. Why bother making something when you can't wear anything that you've worked on?
  • I'm going to work on getting my class work (ugh, yes i'm going back to school) done first before I sew. That way I won't feel anxious or guilty when I'm sewing.

Friday, January 11, 2013

Bloomin' a peplum: Converting a men's shirt into a peplume

Hi guys! I'm really excited to share my first refashion. I've always had issues finding clothes that fit my body type and I've found a way around it! Hope you guys enjoy it. I know I did :) I was up sewing until 1 am! Just like the good old days :)

Converting a men's dress shirt into a peplume

After!
Before...


Things to consider...

  • Price- I got my men's shirt at Salvation Army's 50% off sale that they have every week. That means I paid around $2.50 for my materials. I would recommend buying refashioning materials from thrift sales, especially if you're new to sewing, instead of using clothes from your closet. 
  • Material- I chose a shirt with a heavy knit. This is a different material than what normal dress shirts are made from. If I had to give this shirt a personality, I would call it "brawny". The main reason for a heavy knit so that you can't see your mistakes are easily. When you use a seam ripper numerous times over an area, it leaves small holes from where your needle punctured the material. 
  • Size- Yes, larger is better. It gives your more room to manipulate the material. More importantly, the it has to be able to fit your curves. I've always had issues finding shirts that fit my bust, and this shirt was the perfect size. That also meant that I had less room to work with, so choose accordingly

I don't have pictures of every step I did because I made a couple mistakes along the way and got too involved to stop and take a picture. I'll try to summarize as best as I can.

  • I removed the breast pocket and sleeves from the shirt first. 
Shot of the new arm hole


It took me longer than expected to take these apart because I was being
careful not to rip the material


  • Adjust the arm hole. The men's shirt will have a gaping hole. This means putting on the shirt, keeping buttons from gaping, and pinching the arm holes to figure out how much to take in.
  • I sewed 2 darts in the front of the shirt to help take in excess material around my waist. I started the darts a little below my bust. I also took in 1/2 inch from the sides. I also sewed 2 darts in the back
After adding the front darts and taking  it
in on the sides
Not a boob shot, just a picture of a dart up close. Look
closely at the grain of the shirt


  • By now, the bodice of the shirt should fit. With chalk, mark where you want to the peplume to start. Try to draw a straight line across, and use that as your cutting diagram.
    • Note: With a men's shirt, you'll want to pay attention to where the buttons fall. I chose to cut after the 4th button.
  • You can then do the shoulders. I folded the material where I wanted it to fall, and hemmed the insides. That sounds a lot simpler that it is. This take a lot of practice.
  • On the bottom part, I undid any threads that are associated with the darts or taking it in on the sides so that I had more material to create a ruffle
  • I used this great tutorial to create and attach my ruffle. 
  • When attaching the ruffle, make sure the button/button holes match up with each other, AND the button on the top as well.
Use lots of pins to keep the buttons/button holes aligned

  • Once attached, time to hem the bottom. I measured the distance from the shortest part of the shirt to the attached waist, and kept that length for the entire bottom. YOU'RE DONE! yayyyy!!!!
Check it out!
I had some issues with the sewing machine around the
sleeves but I'll fix that later
I'll admit, it's a little loose in the back, but I'm fine with that


This shirt is totally adorbs. I'm happy with the result!
I hope you guys enjoyed my tutorial! I can't wait to show you more projects! 

Tuesday, January 8, 2013

Spice of life

I was "this" close to naming my post "Spicy Ma-Ma", but decided to be classier :) I made kim chi the other day and wanted to share the recipe and pics! I altered the recipe from here because I didn't have sweet flour or oysters.


Recipe:

  • 1 large size napa cabbages (about 8 pounds: 3.6 kg) 
  • 3 carrots
  • salt
  •  1/4 cup flour, 1/4 cup sugar, water
  • 2 cups of hot pepper flakes
  • 1/2 cup fish sauce,
  • 1 cup of  fresh garlic, minced
  1. Cut cabbage and carrots into strips. Wash multiple times. Pour salt over both cabbage and carrots. I put them in 2 bowls to wash them thoroughly, but I eventually combined them for the next step.
  2. Pour and mix salt over the cabbage and carrots. I don't have a set amount that I pour on, but the more salt you use, the quicker it'll zap the water out. Either way, I mix a bunch of salt and let it sit for 3-4 hours
  3. Now to make the flour mixture. Combine flour and water in a pot. Turn on the heat to medium high heat and constantly stir. When the mixture starts to boil, it'll also start to thicken. When you see the first sign of it thickening, turn off the heat!!!! Add the sugar and stir until you think the sugar is melted. Put aside to let it cool down
  4. Left: Flour mixture cooling; Right: What the cabbage/carrots look like after salting
  5. Wash the cabbage/carrots thoroughly (3 times).
  6. Combine all ingredients in a large bowl. I use a big spoon to mix the stuff because I heard that the chili flakes can be harsh for your skin.
  7. Put the kim chi in an air tight container. I used a plastic jar that I found in Walmart. I know that the best storage container would be made out of glass, but I couldn't find out with a good lid. We'll see how it goes!
  8. Store in a cool dark place for 1-2 days (4-5 if you want it to be tastier) and refrigerate.


I hope you guys enjoyed this recipe! Try it out for yourself! Kim chi is good for your digestion and is super tasty :)

Saturday, January 5, 2013

I'm no longer a little bit country

The time has finally come! My Brother XL-2600i sewing machine finally came! I bailed on my friday night plans so that I could wait for the UPS guy to deliver my machine (He didn't come until 7pm!). I knew I wouldn't enjoy the night knowing that my machine was sitting outside of my door where anybody could take it. But here it is, and boy am I glad that decided to upgrade.

Note: Amazon didn't send it inside another box. They shipped it using the retail box  : /  Talk about lack of privacy


It only took me one try to wind a bobbin, thread the machine and try sewing. Since I was testing quilting thread, I had to experiment with the tension but that was so much easier than on my previous machine. Note to self, when using thick/courser thread, use higher tension!

Now to my project: Converting bootcut jeans to skinny jeans. I know the skinny jean fad has been around for more than 4 years, and I'm extremely behind the curve with this. Two months ago, most of the jeans in my closet were bootcut jeans until I started looking into straight jeans. For those who don't know, I have enormous calves and they don't go well with skinnies. One time I even ripped a pair of skinnies trying to fit my calves into them :( With that said, I knew that I had plenty of jeans that are waiting for conversion.

I think I'll try to summarize existing tutorials out there before I start my project. That way everyone knows why I did it. 

 Ok, on jeans, there are 2 different stitches on the side of the jeans. On the outside, there's a basic stitch that looks like 2 materials joining when looking on the outside. The on the inside, along the thigh, I'll call it a double stitch, where they did a basic stitch and reinforced it by ironing (or pressing) the seam and stitching it again. 

For starters, taking in the material. I saw one video only taking in material on the outside of the jeans. That seems reasonable because of the stitching (I'll get into that later). However, I saw in another tutorial that if you only take in the outer, that shifts the grain of the jean and you'll actually see the twisting of the material along the front of your calves. 

One of the blogs that I follow also say to start taking in material starting at the crotch. You can see her video here. That is difficult for me since my jeans are snug from the crotch to the thigh. I decided to take in the material starting at, or a little below the knee. I laid a pair of straights that I liked on top of the bootlegs and started pinning.


I'm using a quilting thread, so that it's a bit stronger. Start sewing down towards the bottom of the pants, and make sure you keep the pins in place. You probably want to use a basting stitch (a wide length stitch that isn't reinforced by reverse stitches) in case you think you might make a mistake. I didn't do that....but I don't mind how it turned out.


Looks pretty good eh? Well, take a closer look
The inside double stitch disappears.  I've thought of this multiple times and I can't think of an easy way to keep the double stitching along the side 
The outside of the jeans looks great though! 
 I hope you guys enjoyed this post! I've started working on another project, so stay tuned!